Showing posts with label Web Design. Show all posts

How to Display/Embed .PDF File in Web Pages

Leave a Comment
Nowadays, website contents in the internet is not only text and image. Some other types of content have often Embedded in web pages. One of them is .PDF formatted. Website content with pdf formatted commonly used for showcase ebook or other long document.

To embed or display file with .pdf formatted, there are 2 simple ways you can used.

Way #1

It is the way to embed .PDF formatted file as full page. It means, there are no other element in that page. It is like you read pdf file with browser, not pdf reader. The way is just link your pdf file with <a> tag.

<a href="http://localhost/bogor-learning/files/cerita.pdf" target="_blank">Cerita</a>

*the red code is path to your pdf file.

The html code above will link to your pdf file. And if you click that, you will open your pdf file in browser like this :


Read More...

16+ Best Flat Icon Sets For Website Free Download

1 comment
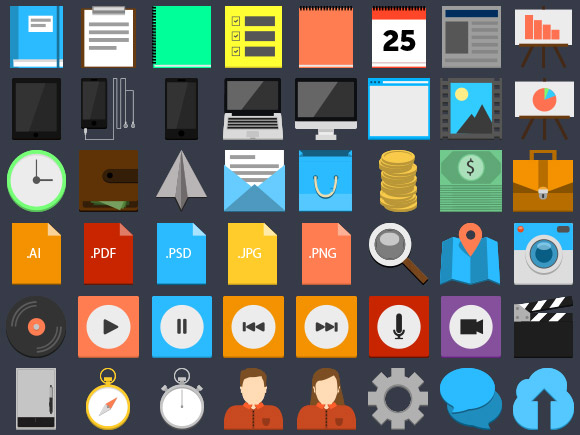
Flat design is web design trends nowadays. So, it is affect to all component of design. One of them is icons to use in web design. Here, i share 16+ flat icon sets to use in your design.  These icon sets divided into various topics that has its own uniqueness, because its designed by different people. I collect this from freebiesbug.com

Here they are..

1. 75 flat-style PSD icons


Read More...

What is Responsive Web Design ?

Leave a Comment
Responsive Web Design is a condition of web page that it design compatible & good looking in any devices with different screen resolution. It means the web page is still good looking when you access it from PC, Tablet, Smartphone and mobile. For example, when you access this site from different devices (PC/Tablet/Mobile), you will see the design is adapting to device resolution . By default, the web page which is designed for PC won't compatible when it accessed from mobile.
Read More...

10 Websites to Find & Download Free icons

Leave a Comment
One of the factors that determine good or not a web design are the icons used. The icons serve as a description of label or text in the web. Sometimes, icon also used as a substitution for the word on the menu, because it looks better visually and easy to understand. The fact said that the representation of something by using a picture (icon) is better and preferred by users.
Therefore, the use of icons when designing a web page can not be underestimated. But, the problem is, not all web developers expert in designing or making icons. So, here i am sharing a list of sites for free and paid-source icons which sort by  quality and completeness of the icon .

1. Iconfinder

Icon Finder
Read More...

CSS Tutorials #1 : Know The Most Commonly Used Of CSS Properties Part 2

Leave a Comment

This is the next part of the previous tutorial, so if you don't have read the previous tutorial, please see that in here :

CSS tutorial #1 : Know The most commonly Used of CSS propreties

We still talk about the most common use of CSS properties. In previous post, I just have told you 2 points. But, now is more. And, from now i won't explain by theory. Because that's boring. So i will explain by practical and a little note.

3. CSS text styling : text-align, text-transform, text-decoration.

Let's see the implementation :

<div class="selector">

This is the implementation of text-align, text-transform, and text-decoration.

</div>
<style type="text/css">
.selector {
border:1px solid black;

text-align:right;
text-transform:Uppercase;
text-decoration:underline;
}

</style>

The codes above will generate the output like this :

This is the implementation of text-align, text-transform, and text-decoration.

The values you can fill for the three properties above is :

text-align: "right", "left", "justify", and "center".
text-transform: "Uppercase", "Capitalize", "lowercase", and "none".
text-decoration: "underline", "line-through", "blink", "overline" and "none".

please try all of the values if you want to know the function of those all.


4. CSS Font Styling : Font-size, Font-family, Font-weight, Font-style

Let's see the implementation :

<div class="selector1">

This is the implementation of Font-size, Font-family, Font-weight, and font-style.

</div>
<style type="text/css">
.selector1 {
border:1px solid black;
font-size:14px;
font-family:arial;
font-weight:bold;
font-style:italic;
}

</style>

The codes above will generate the output like this :

This is the implementation of Font-size, Font-family, Font-weight, and font-style.


The values you can fill for the three properties above is :

font-size: you just can input the values by "pixel".

font-family: There are too much kind of font you can input as values. See on Microsoft office word fonts. Also, you can input the value by combine some of fonts Like this :

font-family:calibri, arial, Trebuchet MS;

The output will be generate the new font. But the first font (in the code above is "calibri") will be dominant font.

font-weight: "0", "100", "200", "300", "400", "500", "600", "700", "800", "900", "bold", "bolder", "Lighter", and "normal".

font-style: "italic", "oblique", and "normal".

please try all of the values if you want to know the function of those all.

5. Float

Let's see the implementation :

<div class="selector2">

<div class="float1">
This is markup.
</div>

<div class="float2">
And this is other markup.
</div>

</div>

<style type="text/css">
.selector2 {
width:500px;
height:200px;
}
.float1 {
float:right;
width:240px;
height:150px;
background:black;
color:white;
}
.float2 {
float:left;
width:240px;
height:150px;
background:white;
}
</style>

The codes above will generate the output like this :

This is markup.
And this is other markup.


Note : To use "float", you must use width and height. Because, without width and height, the "float" will seen like not functioned. Also, I use the background color to make mark the "float1" and the "float2".

The values :

float : "left", "right", and "none".


6. Position

Let's see the implementation :

<div class="selector3">

<div class="relative">
This is Markup with "Position:relative;"
</div>

<div class="absolute">
This is Markup with "Position:absolute;"
</div>

<div class="fixed">
This is just demo for "Position:fixed;"
</div>

<div class="static">
This is Markup with "Position:static;"
</div>

</div>

<style type="text/css">
.selector3 {
width:500px;
height:300px;
border:1px solid black;
 position:relative;
font-size:12px;
}
.relative {
width:150px;
height:100px;
position:relative;
background:blue;
}
.absolute {
width:150px;
height:100px;
position:absolute;
background:black;
top:0px;
right:0px;
}
.fixed {
width:150px;
height:100px;
position:fixed;
background:red;
bottom:0px;
left:300px;
}
.static {
width:150px;
height:100px;
position:static;
background:green;
}
</style>

The code above will generate the output like this :

This is Markup with "Position:relative;"
This is Markup with "Position:absolute;"
This is just demo for "Position:fixed;"
This is Markup with "Position:static;"


Note : As you see, CSS position have 4 option of values : "relative", "absolute", "fixed", "static". Explaining all functions of values are complicated to me. So, I give you the sample of all. just try it all and know the functions. For "position:absolute;" and "position:fixed;" you must use the properties of "bottom", "top", "right", and "left" to set the position. The values is by "pixel".

Okay. That's all for first tutorial. I hope this is helping you. Wait for the next tutorials next week.. See you ;)


~Muhammad Syakirurohman with his young spirit~

Read More...

CSS tutorials #1 : Know the most commonly used of CSS properties part 1

Leave a Comment
Hello, blogger long time no see :D.. Here i online again and will share something to you. Now and then i will make posts series about CSS tutorial.And, I promise to never stop posting on the way :D, I will post every week(on saturday or sunday) for this series. Okay, Let's begin..

First you must read this article to know basic of CSS :

KNOW THE CSS CODE FOR YOUR BLOGS

Image from cscie12.dce.harvard.edu
If you have read the post above, Now i will assume you that you have know how to use CSS in the website or blog. Now we will talk about CSS properties that most commonly used by people.


1. Background and color

Well, from the name i sure that you have know what is background and what is color. Okay, just go ahead to implementation.

<div class="selector1">This is implementation of CSS background and color</div>
<style type="text/css">
.selector1 {
background:black;
color:green;
}
</style>

The code above will be generate the output like this :


This is implementation of css background and color

The values
Above, i use value of "black" for background and "green" for color. if so, your option is limited because you can only input the value by the color name you know. Because of that, you should input the value by hexadecimal codes or rgb(red,green,blue). By this kind of values, you option is very much. The sample of use is :

*hexadecimal
background:#000000;          -#000000 is hexadecimal codes for black-
color:#00ff00;                      -#00ff00 is hexadecimal codes for green-

*RGB
background:rgb(0,0,0);         -rgb(0,0,0) is hexadecimal codes for black-
background:rgb(0,255,0);     -rgb(0,255,0) is hexadecimal codes for green-

Rgb is color setting by combine 3 of basic color (red, green and blue). The smaller value then the color will be  darker. The bigger value then the color will be brighter. Each of basic color have value from 0 to 255. Essentially, Hexadecimal and RGB is related. They are have same pattern. See, i will compare them by sample of "green".

#00ff00
rgb(0,255,0)

If we compare them we will take a conclusion that :
# is other form of rgb,
00 is other form of 0,
ff is other form of 255,
00 is other form of 0

yeah, like that. If you want learn more about hexadecimal and RGB just see it :

COLOR PICKER TOOL

2. Width, Height, Border, Margin and Padding

Surely, for width, height and border you have know what the means they are. But, for margin and padding, i will tell you what they are, because maybe they are different with what you think. Margin is an invisible line outside the selector area that separate it with other areas. The size of margin determine the range with other selector areas. While, Padding is an invisible line inside the selector area that give range between border of area and the contents therein. This is how to use them:


<div class="selector2">
<div>This is implementation of CSS Width, Height, Border, Margin and Padding</div>
</div>
<style type="text/css">
.selector2 {
width:200px;
height:100px;
overflow:hidden;
border:1px #000 solid ;
padding:5px;
margin:5px;
}
.selector2 div {
background:#000;
color:#fff;
height:100px;
}
</style>

The code above will be generate the output like this :

This is implementation of CSS Width, Height, Border, Margin and Padding.
Which is border, padding, and margin?
-border is the black line that surrounding the area.
-Padding is the no color space between border and the sentences "This is implementation of CSS Width, Height, Border, Margin and Padding".
-Margin is invisible outside the border. Margin will only be known if there are other areas that adjacent.

Image from www.templatemonster.com


The values
-Width and height : you can input value by "pixel" and "percent" (Like this :width:100%;). If you use percent, the real value is the pixel value of the parent element. The example is : if you add "width" or "height" property in to selector ".selector2 div" with value "90%", Then the real value is "90%" of "200px" (width/height of ".selector2"). Also, you can input the value by "auto" if you want to automatic.

-Border: "1px" is the size of border. "#000" is the color (Also you can use hexadecimal codes and rgb). And "solid" is the type of border. There are various type of border you can use. This is the list :
   -medium
   -thin
   -thick
   -dashed
   -dotted
   -double
   -groove
   -inset
   -outset
   -ridge
   -solid

if you want just make 1 side of border, like right side, you can use this code "border-right:1px #000 solid;"

-Margin and padding : 5px is size of margin/padding. If you want to use margin/padding only for 1 side, like right side, you can use this code "margin-right:5px;" or "margin:0px 5px 0px 0px;" (note: "margin:'upmargin' 'rightmargin' 'bottommargin' 'leftmargin'; "). Special for margin, you can make the area be located at center position by code "margin:auto;" or "margin:0 auto" or "margin:0 auto 0 auto;".. But it is not working for padding.

yeaah, for today i just share until here. Just wait the part 2 next week. See you :). Hope this stuff is very helping you.

~Muhammad Syakirurohman with his young spirit~

Read More...

How To Fix and Avoid Missing Title Tags In Blog/Site Pages

8 comments
This post is about meta tags for SEO onpage in your blog. Before I talk more,i recommend you to read also this important related posts :


Duplicate content make SERP down
Seo onpage tips : Optimize page attributes and elements
How to fix duplicate meta description
 
Okay, before discussing the tutorial, I will explain what is it and how important it, in order you more serious and don't underestimate this stuff.

-What is title and title tag, and how important those-


You surely already know what is title. Title is the name of a site page. Title describe the contents of a site page. without a title, the content a site page is not be known by users who will visit it. In the page of a website, title displayed like this (see the image) :

this is title page for about me page


Title is very important for a website pages, Especially for SEO. What is the first indexed from a website by search engines ? What the displayed results in search engines when we searching?
Well, The answer is TITLE. Title is most important element for SEO of website. Therefore you must pay more attention for this.
Then, What is Title Tag ?
Title tag is a html code which is used to create title for site page. In HTML code, Title tag is placed between head tag(<head></head>). Title tag used by robot crawler to detected that the sentences between title tag is title of pages.


<Html>
<head>
<title>this is title of website pages<title>
</head>
</html>


-How can title tag missing?-


The first i say is : I would never write this post if there are no missing title tags. hehehe.

Everyone have known that title is very important. So, when they create a site page, they are never underestimate it. They surely complete the page with title tag.

Unfortunately, any site -In this case is dynamic site- not only constructed by pages which created manually (by type the source codes). Moreover a blog pages which created by tools. Sure, any site have a program that used to create page automatically, which in general is to create page of post or other updated information.

Well, the problem is in the program. The error in the program can cause missing title tags. This can also occur in your blogger blogs if your meta tags have an error.

However, blogger actually has set their blog free of this error. As Default, Blogger blogs has set without any error. So, This error usually caused by users which put meta tags manually in their blog. Indeed, This is will make the blog more seo friendly. But, This also make an error, missing title tags.

In blogger blog, Usually the pages which missing title tags are archive pages, pagination pages, search result pages, and even static pages.

So, if you want to add meta tags manually for your blog, be careful! because some of codes in tutorial instead make an error in your blog.

In this blog also there are post about SEO friendly Meta Tags. But, I guarantee you will not be find your blog have an error if you use SEO friendly meta tags which i recommended.

-How can you know your blog/site pages have missing title tags?-


There are two ways to know your blog pages have missing title tags :

1. You open the pages in your blog/site one by one in your browser. If you see a page which has no title, then that page is missing title tags.

page with title tags

page without title tags


2. You use Google webmaster tools for your blog. See the tutorial about Google Webmaster tools in this blog if you new in Google webmaster.

How Important Webmaster tool
How to submit site to Google Webmaster tool
Google Webmaster Tool Features

In Google webmaster tools, there is a feature to detect your blog pages with missing title tags. Just go to Optimization Menu > Html improvement > Missing title tags.

missing title tags on google webmaster tool


-How to fix and avoid missing title tags in blogspot blog?-


If you found your blog pages missing the title tags, Immediately fix it by the way below :

1. Log in to your Dashboard.
2. Go to Template Menu of blog selected.
3. click "Edit HTML". *don't forget to backup your template before edit HTML

4. Find the code "<b:include data='blog' name='all-head-content'/>". you can press "CTRL + F" to search.

5. After that, Put the following codes under <b:include data='blog' name='all-head-content'/>


<b:if cond='data:blog.url != data:blog.homepageUrl'>
<title><data:blog.pageName/> | <data:blog.title/></title>
</b:if>


If be translated to human language, the code above is mean :
"If the url is not home page url of blog, then the title is 'page name | blog title'"..
the example : the title of About me page in this blog is "About me | Syakirurahman"
You can remove " | <data:blog.title/> " if you want your page title not followed by your blog title. But, i recommend you to keep use blog title in your blog pages. Because, I think that's more SEO friendly and more interesting. You also can modify " | " as you like. The example change it by " : " or " - ". That's up to you.

6. Finally, Save and finish editing. Just check the result.

-How about site besides blogger blog? for example wordpress or other website?-


Surely, if the kind of site is different then the way is different too. But, in other site besides blogger, this case is very rare found. So, I am not discuss it here. Maybe, i will post it later. Or feel free to contact me if you found this problem in your website. Insyaallah, I will help you by my best.

Happy Blogging :)

Muhammad Syakirurohman with his young spirit.
Read More...

Beginning to Learn About Web Security and Hacking

Leave a Comment
website security and hacking Internet is a media which allows us to connect and found the thing we are looking for. By all of the easiness, internet was able to anesthetize everyone to use it. Currently, the number of internet user has been growth rapidly. This is cause website realms growth rapidly too. Many people create website or blog with various aims. there are  for expression of opinion, diary, support tool of business, and even make money online.
Amid mounting this growth of site realms, several irresponsible people appear to take unilateral advantage. Their action harm others. They stealing data and deface of others website, stealing private data, even break into the bank accounts through the internet. They are what we called as Hacker.
As a website or blog owner, it is a mandatory thing to know about web security and how hacking works. At least, This is to avoid you website or blog touched by irresponsible hands. Usually, for blog which use famous platform like blogger/blogspot and wordpress is safer because it was designed very safe by default and it database hosted at big server which is very safe too(google data center and wordpress server). But, it is not reason for you to don't know about web security.
However, It is different if you build website or blog yourself and hosted at yourself hosting. You need high skill to build strong security for your website. Therefore, here is the important reason why you must learn about website security and hacking. Learn about hacking is not mean you will become a hacker. it is just to know how hacking works in order you can prepare to avoid it when someone attack your site.
Then, just learn it to secure your website now. There are many website in internet which is give tutorial and knowledge about website security and hacking. one of them is http://ilmuhacking.com (indonesian website). Learning with patience and keep spirit. Let study with me together.

About my learning
myself also just beginning to learn about it. I use www.ilmuhacking.com as my source. My desire to learn it has been there about a month ago. But, just now i can learn it. My motivation actually is not only for secure my website. Other motivation is because i want to hack some website which contains racial intolerance elements and other which violate the law.
About two month ago, I felt in indonesia appeared several facebook fanspages which contains racial intolerance. I very hate it. Then, I also found many website which contains similar contents. So, I decide to hack them in order my country is free from cleavage and stick together.

Well, How about you ?

Muhammad Syakirurohman with his young spirit.
Read More...

Tips And How to Change Template Design of Blogger/blogspot

1 comment


Your design blog template is a thing which important enough you should consider. It because very affect your readers comfort. The good template will make your visitors enjoy to read your posts. Even, sometime some readers visit a blog just because want to enjoy the design or aims to study good design. Surely, That's because the design is very good. The good design is include good navigation and pretty sight.
Well, if you feel your blog template design is not include of good design, immediately to change and redesign it. If you have no design programming skill, you can use many template which was provided in many blog template sites whether it paid or free. However, a paid template is better than free template. So, If you have enough of money and you willing to spend it, Just buy the paid blog templates. There are many blogger template sellers in internet. But, If you want free, just download the free templates in www.btemplates.com, www.premiumbloggertemplates.com, www.deluxetemplates.net. Those is the sites i recommend to download free template because those has been famous and provide good templates. Just recommendation for you, Read the tips to choose template design before you download in order you choose the good design.

Well, After you download or buy the template, Extract the file because usually the downloaded template is still compressed by winrar of other compressor software. Then, you must install that to your blog.
Follow the steps below to install and use your new template for your blog.

1. Log in to your Dashboard.
2. Click the blog title which you will change the template
3. Go to "Template" menu.
4. See to the top right corner and find "Backup/Restore", Click that.
5. "Download full template" to backup your currently template.

backup and restore template

6. Then, Choose file to upload your new template which have downloaded.
7. Find the directory of the template file was extracted.

upload template


8. Then open and upload the file with .xml format.
9. well, the template was uploaded and used.

Well, That's all from me. Just make your blog interesting and get much visitors. If you have any problems or questions for your blog design, I am willing to help you for free. Hope this article useful for you. Happy Blogging :)

Muhammad Syakirurohman with his young spirit.

Read More...

How to Remove Scrollbar in Your Blog/site Pages

4 comments

Okay, Now I will give you a tutorial how to remove scrollbar in your blog. As you see, there are no scrollbar in this blog. Indeed, This is not effect  to your blog performance. But, If you also like to remove that too, Just Follow the steps below :

1. Log in to your Dashboard.
2. Go to "template" menu.
3. Click "EDIT HTML".
4. Proceed. *tips : backup your template before you editing HTML of template.
5. Find This code : ]]></b:skin>
6. Then Put The following codes above ]]></b:skin> ( or between <b:skin><![CDATA[ and </b:skin> ) :

::-webkit-scrollbar {display:none;}
::-moz-scrollbar {display:none;}
::-o-scrollbar {display:none;}
::-google-ms-scrollbar {display:none;}
::-khtml-scrollbar {display:none;}

7. Then, Save template and Finish.

Your scroll in your blog pages have been removed.
Okay, That's it. If that is not working. Don't hesitate to ask me. Happy Blogging :)

Read More...

10 Programming and Designing Skills to Blog Professionally

Leave a Comment
There are many skills that you must mastered to blog professionally as i said. One of them is basic programming and designing sites/blog skills. Read also "7 basic skills needed to blog" in this blog. Well, the skill which discussed in this article can be said is the advanced of programming and designing skills.
This is so important if you want to become professional blogger. You will be more freely to manage and edit your blog/site performance or design. You also should not to ask and hire someone to help you to edit your blog.
The following is those skills. I arrange it by level of importance. So the first point is most important.

1. HTML
Hypertext Markup Language(HTML) is most important. All bloggers must mastered this programming language. This is most important basic of web programming. All sites constructed by HTML codes. Don't worry, HTML is easy if you like to learn it. The new version of HTML is HTML5. For more details about HTML, Read this > Know HTML programming.

2. CSS
CSS or cascading style sheet is a programming codes to design and decorate your blog/site. Your blog will be interesting and nice to look by this codes. The new version of CSS code is CSS3. to more details about css > know css codes for your blog.

3. Adobe Photoshop
I am sure, you have heard this software, or even you have mastered this. Adobe photoshop is a software to edit photos or images. This software is needed to designing your blog. You need this to create banner image, logo and other for your blog.Adobe photoshop 'make cooperation' with css codes to create a good design for blog.

4. XML
XML is just for blogger/blogspot blog. For you who are not use blogspot, xml is no need to mastered.
Actually it is not programming language. XML (Extensible Markup Language) is a metalanguage that allows users to define their own customized markup languages. XML was designed to transport and store data. XML in blogspot used for take your data from database (google data center) to show in your blog.


5. Jquery
Jquery is part of javascript. It is friend of css codes. they are complemetary. Jquery is for unique effect style, while css is for decoration. To use Jquery you firstly must install Jquery in your sites.

6. Corel Draw
Actually this is similar with adobe photoshop. It is a software to design too. Only, corel draw is more to draw/create images.

7. Javascript
Javascript used if you want your blog more interactive. you can make function with this codes. javascript usually used by bloggers who want their blog more interesting. Javascript which most used is Jquery.

8. PHP
Hypertext Preprocessor (PHP) is a widely used, general-purpose scripting language that was originally designed for web development to produce dinamic web pages. PHP is only used for wordpress blog or other blog who support php codes.

9. Database
Database is highly correlated with php. Php create a dinamic web page by data from database. This also only for wordpress blog (self hosting). You can create a new function for your blog by create database and use php codes to run in blog.

10. Adobe Flash
This is advanced of designing skills. This is software to create animation for your blog. Well, this is for make your blog more interesting by animations.

From the 10 skills above, some of them will be i write about it tutorials. There also the articles about this have written. you can find it in web design and web develope category. If you want to get more and step by step tutorials you can learn it in www.w3schools.com. w3schools is  a website contained about programming tutorials(basic - master). I believe, you will helped by this site because i think it is so good website with very useful contents.

Well, From the 10 skills above, which have you mastered and most interested? Just prioritize the most important skills. Happy Learning and Blogging :)

Muhammad Syakirurohman with his young spirit.
(image from sphereofinfluence.com)
Read More...

What is Robots.txt File and How to Set It

2 comments
As a blogger, maybe you are ever to heard the word of 'robots.txt'. I believe, you surely confused when heard it. Well, I also confused when i heard it first time. But Now, i had know it and i will share and explain it to you as my best.

What is Robots.txt

Robot.txt file is a file with text(.txt) format that owned by each sites that online in internet. Any sites should have this file or the security of that site will broken. Robot.txt serves to control and regulate which the pages or directories will published in search engines. how it works is by put some codes inside it to control search engines to crawl or not the pages in that website. It surely to protect your system pages to known by people. Administrator pages is a page which abstinence to known by peoples or indexed by search engines. So, all of sites surely disallowing it administrator pages to indexed by search engines. Well, It is did by robot.txt. Robot.txt allow you to manage which the pages may crawled and indexed by search engines.
same as website, Blog also have robots.txt file. Only, robots.txt in a blog usually have set as default by the blogger platform. For blogspot blog, the default of the robots.txt is set like this :

User-agent: Mediapartners-Google
Disallow:

User-agent: *
Disallow: /search
Allow: /

Sitemap: http://blogURL/feeds/posts/default?orderby=UPDATED


The meaning of the code above is the robots.txt file allow the google adsense crawler to crawl all pages of your site invariably, and allow all crawler to crawl all of your blog pages except the page with url prefix blogURL/search. The pages with this url prefix is labels and archives post pages.

How to Set Robots.txt

If you want to modify and set your robots.txt, firstly you must be careful because an error of your setting will make your website SERP on search engines disappear. You must have a clear purpose because it is not a little thing for your site/blog.
Okay, now I will tell you how to set it by right. You must know the meaning of each codes in robots.txt file above.

" user-agent : Mediapartners-Google " : it is means that the codes which placed under it apply only with Mediapartners-Google crawler. Mediapartners-Google is google adsense crawler.

" Disallow: " : It is means that no pages disallowed to crawl by crawler. By other word, allow the crawler to crawl all pages on the site.

" user-agent : * " : it is means that the codes which placed under it is apply with all of search engines/crawler

" Disallow: /search " : Disallow the crawler selected to crawl the url that have prefix blogurl/seach...

" Allow: / " : Allow the crawler to crawl all of pages.

" Sitemap: http://blogURL/feeds/posts/default?orderby=UPDATED " : this is sitemap of your site which submitted to crawled by crawler.

Not only the codes above can use in robots.txt. Just for the example, i want to blocked this post by robots.txt in order do not indexed by all of search engines. so i can do it by put this code.

user-agent : *
Disallow: /2012/11/what-is-robots-and-how-set-it.html

well, to block the root folders or directories(included it contents) in your site, you can do this :

user-agent : *
Disallow: /cgi-bin/
Disallow: /wp-admin/
Disallow: /wp-includes/
Disallow: /wp-content/plugins/
Disallow: /wp-content/cache/
Disallow: /wp-content/themes/

we can also set robots.txt in order to do not crawl and index a specific keyword. the example we want to block the word "people" to no-indexed by all search engines. we can set like this :

user-agent : *
Disallow: /search/*people

we can also set robots.txt to block the file in your site with specific format. The example we will block file with format php(.php), css(.css) and javascript(.js).

user-agent : *
Disallow: /*.php$
Disallow: /*.js$
Disallow: /*.css$

User Agent

In setting of your robots.txt, you can set which the crawler you allowed or disallowed to crawl. This is did by setting the user agent. Therefore, you must know the names of some famous crawlers/spiders. This is it lists :

Google adsense - Mediapartners-google
Google - Googlebot
Altavista - Scooter
Lycos - Lycos_Spider_(T-Rex)
Alltheweb - FAST-WebCrawler/
INKTOMI - Slurp
Yahoo - Yahoo Slurp
MSN- Msnbot

*note :
-Any example i explain above is for blogspot, except the example for block folders/directories (it is for wordpress. Each sites have different set of robots.txt. It is because each sites have different directories too. The setting robots.txt of wordpress blog surely will different with blogspot blog, but the rules of codes are same.
-If you have a sites which no use blogspot platform. you must add robots.txt file and locate it on main root of your site.

well, that's all. Still any questions ? don't hesitate to ask me. Now, you have know and can set your robots.txt file of your site. i waiting for your response. Hopefully useful for you. Keep happy blogging guys :)
Read More...

Syakirurahman Green Page Menu Style

Leave a Comment
Well, Now i will share about page menu style again after i shared two (page menu with ribbon style and syakirurahman page menu with dropdown style) some times ago. This page menu style use green as basic color. so, this page menu will more suitable if your template have green as basic color.


okay. I will not more talking. Lets to follow the steps below to use this page menu to your blog.

1. log in to your dashboard
2. go to layout/design menu
3. add gadget with HTML/javascript type.
4. then copy the code below and paste on HTML/javascript gadget.


<style type="text/css">
.MSR_menu {
left:10px;
text-transform:uppercase;
font-size:15px;
position:relative;
margin: 0;
padding: 0;
list-style: none;
height:35px;
background:#159515;
border:solid 1px #000;
}
.MSR_menu li{
background:rgba(0,0,0, 0.1);
display:inline;
margin:0 auto;
float:left;
position:relative;
padding:5px 1px;
text-align:center;
}
.MSR_menu li a {
text-decoration:none;
background:#fff;
color:#000;
font-family:arial, calibri, trebuchet MS;
font-weight:bold;
padding: 7px 28px;
border:solid 1px #000;
}

.MSR_menu li a:hover, .MSR_menu li a:active {
background:#07DC07;
-moz-transition:all 0.4s linear;
-webkit-transition:all 0.4s linear;
-google-ms-transition:all 0.4s linear;
-o-transition:all 0.4s linear;
padding-bottom:14px;
-moz-border-radius:0px 5px 5px 0;
-webkit-border-radius:0px 0px 5px 5px;
border:solid 2px #000;
}

</style>
<ul class="MSR_menu">
<li><a href="#">menu 1</a></li>
<li><a href="#">menu 2</a></li>
<li><a href="#">menu 3</a></li>
<li><a href="#">menu 4</a></li>
</ul>


This is Demo :


5. modify the red code to your url you like to linked.
8. click save and place it on the top of your layout.
9. finish.

*tips: if you feel this page menu style is not comply with your blog design, i strongly recommend you to don't use this page menu style.
that's all, if you have any questions, you can ask it on comment box below, i looking forward for your response.
Happy Blogging :)
Read More...

How to make Floating/fixed widget (by CSS)

Leave a Comment

For a Blogger, floating widget on blog maybe is an important for make easy navigation. the function of floating widget is to show that is important widget you want to always seen by visitors. The content of floating widget usually is a widget that ask visitors to participate on our blogs.
however, Some Blogger confused and can't to make this widget (maybe you included, hehe) . So, here i will tell you how to make fixed widget on your blog. the ways is not too difficult.

1. Log in to your dashboard.
2. go to "layout/Page element" Menu.
3. Choose or add widget you like to made fixed style.
4. Then, see the id of that widget. the way is like the image below.


*example, your widget id is HTML4
5. After you find and know the widget ID, Go to Template
6. EDIT HTML >> Proceed. *tips : backup your template before you editing HTML
7. Check "expand widget template".
8. find the code of your widget like image below :


*find it by do search by click CTRL + F.

9. after that, add the red code so be like Below :

<div class="html4">

<b:widget id='HTML4' locked='false' title='' type='HTML'>
<b:includable id='main'>
  <!-- only display title if it's non-empty -->
  <b:if cond='data:title != &quot;&quot;'>
    <h2 class='title'><data:title/></h2>
  </b:if>
  <div class='widget-content'>
    <data:content/>
  </div>
</div>


10. then, place the css code below above ]]></b:skin> or between <b:skin><![CDATA[ and ]]></b:skin>code.

.html4 {
position:fixed;
z-index:9999;
bottom:0px;
right:0px;
}

*css code explanation :
- .html4 is tell that your widget class is html4. it is because code <div class="html4"></div> you add before.
- bottom:0px; and right:0px; it tell that your widgte position is at right bottom corner. you can modify it as you like. ex. top:0px; and left:0px; is for locate at top left corner.
*if your widget id is not html4, change the html4 code above by your widget id.

11. save it and Finish.

okay, That's all. If you have any questions, just ask by leave comments below.

hope this useful for you. Happy Blogging :)

Read More...

How to add stars effect on links

Leave a Comment
stars effect on links in your blog will make seen interesting. This effect is animation. okay, i will not elaborate. if you want to add this effect to your blog. just follow the step below :

1. Log in to your Dashboard.
2. go to "template" menu
3. choose Edit HTML > Proceed
4. find the css code a:hover  and put the code below.

background-image: url(https://blogger.googleusercontent.com/img/b/R29vZ2xl/AVvXsEgHS-FT0sEI8pK6o5MG4HqUlo_W5L7tNqxoZrpoDewvqP5UQYoosysonjiAFwDae2bdlEnWyLAtnxr07NOZ6T0i5tbd3ywdfm4dzJDI6mO-dW_dcn6Itze3J8SoYxV1EnDjG9ETJ5u2orU/s1600/stars.gif);

so, the code become :

a:hover { background-image: url(https://blogger.googleusercontent.com/img/b/R29vZ2xl/AVvXsEgHS-FT0sEI8pK6o5MG4HqUlo_W5L7tNqxoZrpoDewvqP5UQYoosysonjiAFwDae2bdlEnWyLAtnxr07NOZ6T0i5tbd3ywdfm4dzJDI6mO-dW_dcn6Itze3J8SoYxV1EnDjG9ETJ5u2orU/s1600/stars.gif);}

*if there are no a:hover code.. so, you just put the code above between code <b:skin><![CDATA[ and ]]></b:skin>
*find the code by click CTRL + F to search


Read More...

Notepad++ : software to practice web programming languages

Leave a Comment

software notepad ++ version 6.2
Notepad++ is a software that frequently used by web programmer to edit and create code for websites/blog. Notepad++ is replacement of regular notepad. Notepad++ have many superiority than regular notepad. it is support many web programming languages like HTML, php, xml, xhtml and others. it also have a interesting display. it is not like regular notepad that have too simple display.
Notepad++ is indeed devoted to source code editor. so you as blogger,  you will need this software if you want to learn about css and html. you can facilitated by it. Though you are beginner on website programming, by use notepad ++ to learn about html and css, i sure you will quick to improve your skill because this software is match for beginner too.

well, if you want to download this software you can download it by click here (version 6.2).
Read More...

How to show Widget on only determined pages

Leave a Comment

Okay.. bloggers. this time i will give you a tutorial how to set display of blog widget on only specific pages. surely, it is so useful for you that install many widgets on blog. your widgets can you manage where it is display and where it is not displayed. if you use many widgets on blog but you don't set it, but you display it on all pages of your blog, your blog will be seen complicated and messy. in addition, it is will enlarge the size of your blog and make it heavy loaded. well, maybe, sometimes you want a widget display only on static pages, or only on homepage, or only on post pages. now, after you finish read this article, you can set it by easy.
this way actually is very simple. it is use conditional tag (<b:if>), a XML tag that maybe ever you hear. this tag will determine a object on your blog to shown on one page but hide on other pages.
okay.. let see and follow the steps below guys :

1. determine and know widget id.

before you set a widget,  you must determine and know the ID of widget you specify. to know it, just go to "layout/page elements" menu > choose and edit the widget you set -then a pop up window will appear - > look at the address bar -see the image below- > find the id.

widget to set

remember that id, because that is the widget id will we set. example. the id that will used is HTML4

tips: set a widget that really suitable to show or hide. prioritize most important and useful.

2. Edit HTML

after you have been determine and know widget id, Go to "template" menu > edit HTML > proceed. then, check "expand widget HTML".
find the html code of HTML4 -press ctrl + f, type HTML4 and you will find it-.


after that, put the red code like below :

*for show widget on homepage and hide on other pages.

<b:widget id='HTML4' locked='false'  title='' type='HTML'>
<b:if cond=’data:blog.url == data:blog.HomepageUrl’>
<b:includable id='main'>
  <!-- only display title if it's non-empty -->
  <b:if cond='data:title != &quot;&quot;'>
    <h2 class='title'><data:title/></h2>
  </b:if>
  <div class='widget-content'>
    <data:content/>
  </div>

  <b:include name='quickedit'/>
</b:includable>
</b:if>
</b:widget>

*for show widget on Post pages and hide on other pages.

<b:widget id='HTML4' locked='false' title='' type='HTML'>
<b:if cond=’data:blog.PageType’==”item”’>
<b:includable id='main'>
  <!-- only display title if it's non-empty -->
  <b:if cond='data:title != &quot;&quot;'>
    <h2 class='title'><data:title/></h2>
  </b:if>
  <div class='widget-content'>
    <data:content/>
  </div>
  <b:include name='quickedit'/>
</b:includable>
</b:if>
</b:widget>


*for show widget on static pages and hide on other pages.

<b:widget id='HTML4' locked='false' title='' type='HTML'>
<b:if cond=’data:blog.PageType  != “static_page”’>
<b:includable id='main'>
  <!-- only display title if it's non-empty -->
  <b:if cond='data:title != &quot;&quot;'>
    <h2 class='title'><data:title/></h2>
  </b:if>
  <div class='widget-content'>
    <data:content/>
  </div>
  <b:include name='quickedit'/>
</b:includable>
</b:if>
</b:widget>


*for show widget on archive page and hide on other pages.

<b:widget id='HTML4' locked='false' title='' type='HTML'>
<b:if cond=’data:blog.PageType  == “archive”’>
<b:includable id='main'>
  <!-- only display title if it's non-empty -->
  <b:if cond='data:title != &quot;&quot;'>
    <h2 class='title'><data:title/></h2>
  </b:if>
  <div class='widget-content'>
    <data:content/>
  </div>
  <b:include name='quickedit'/>
</b:includable>
</b:if>
</b:widget>


*for show widget on special page (based URL) and hide on other pages.

<b:widget id='HTML4' locked='false' title='' type='HTML'>
<b:if cond=’data:blog.PageType  == “Your Page URL Here”’>
<b:includable id='main'>
  <!-- only display title if it's non-empty -->
  <b:if cond='data:title != &quot;&quot;'>
    <h2 class='title'><data:title/></h2>
  </b:if>
  <div class='widget-content'>
    <data:content/>
  </div>
  <b:include name='quickedit'/>
</b:includable>
</b:if>
</b:widget>


*tips : before you edit html, get used to backup your template first. it in order when you do an error, you can back your template like before.

you can choose which match with your requirement.

3. if you have finish edit and set. don't forget to save it.

that's it. just practice it. if you have any questions and error when edit HTML, you can ask me by leave the comments below. i waiting for your response.

hope useful and Happy Blogging :)
Read More...